 Save
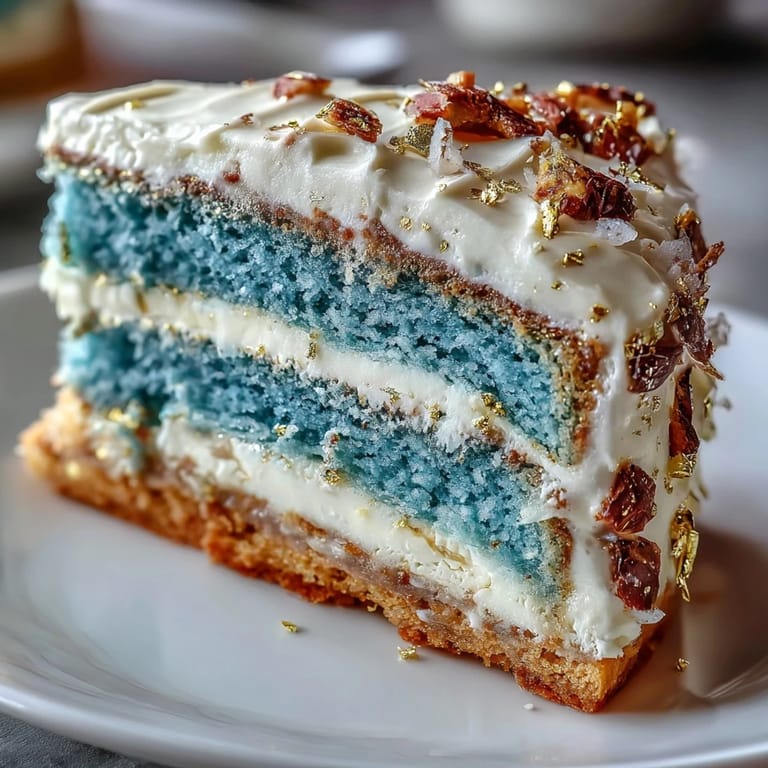
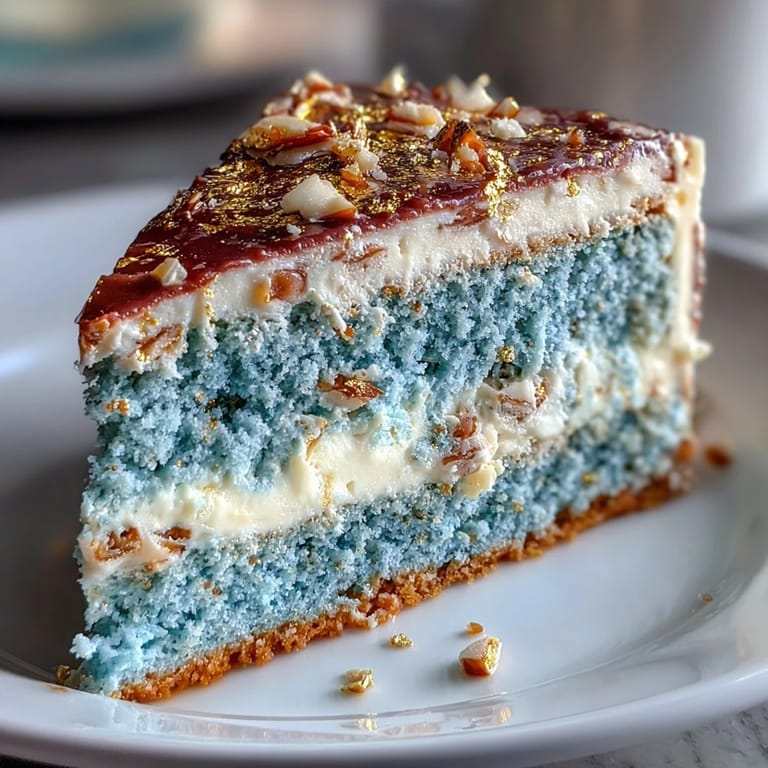
Save The idea for this graduation cake came to me after catching a whiff of freshly baked butter while prepping for a family celebration. I was surprised how a simple scent could inspire an entire dessert themed in deep blues and shimmering gold, setting the tone for something truly special. As I watched the batter change colors in each bowl, it felt almost magical—the shades melting together like the excitement of the milestone itself. There’s something about bold color that grabs everyone’s attention, especially when backed by tender vanilla layers and rich buttercream. Each time I make this cake, the kitchen is quickly filled with anticipation—and a few delighted giggles as blue streaks end up everywhere.
Once, I made this cake for my cousin’s group celebration, and the soundtrack was laughter blended with spirited debates about which shade of blue matched the school colors best. Even though someone accidentally swapped the gold dust with cocoa powder, the improvisation led to a hilarious moment and a lesson—always double-check the labels! That afternoon, the boys posed for photos with the cake, and I couldn’t help but notice the proud glances exchanged. It was the cake topped with gold leaf and cheers that really set the mood for their big achievement. Looking back, every slice felt like a piece of the party they’d never forget.
Ingredients
- All-purpose flour: Provides structure—be sure to measure properly to avoid a dense cake.
- Baking powder and baking soda: Balances rise and lightness; checking expiration dates saves cake disasters.
- Salt: Sharpens vanilla flavor, and a pinch makes the sweetness shine.
- Unsalted butter: Use room temperature for creamy mixing; too cold and the batter won’t blend smoothly.
- Granulated sugar: Cream it well with butter to build lift and a fine crumb.
- Eggs: Room temperature eggs make layers moist and even—forgot once and got lumpy texture.
- Pure vanilla extract: Offers deep aroma; don’t skimp as it anchors both cake and buttercream.
- Whole milk: Gives tenderness and richness; gentle warming prevents curdling.
- Blue gel food coloring: Gel colors create vivid ombre effects without thinning batter.
- Powdered sugar: Sift for lump-free buttercream that spreads silkily.
- Milk or cream: Adjusts buttercream consistency; start slow, add as needed for smoothness.
- Dark blue gel food coloring: For intensive color; add gradually for the ideal shade.
- Edible gold leaf or dust: Adds drama—handle carefully, as gold tears easily.
- Clear alcohol (vodka or lemon extract): Helps gold dust adhere; use sparingly for striking accents.
Tired of Takeout? 🥡
Get 10 meals you can make faster than delivery arrives. Seriously.
One email. No spam. Unsubscribe anytime.
Instructions
- Set Up the Pans:
- Grease and line three round cake pans, making sure parchment fits snugly—otherwise cake edges stick and peel unevenly.
- Mix the Dry Ingredients:
- Whisk flour, baking powder, baking soda, and salt until airy; this step prevents clumps and helps the cake rise evenly.
- Cream the Butter and Sugar:
- Beat butter and sugar together until pale and fluffy, listening for the swoosh of the mixer—a real sign of readiness.
- Add the Eggs and Vanilla:
- Incorporate eggs one at a time, then vanilla, watching as the texture turns satiny and smooth.
- Combine Wet and Dry:
- Alternate flour mix and milk, starting and ending with flour; scrape the bowl sides gently to keep batter silky.
- Tint and Divide Batches:
- Split batter into three bowls and stir in blue gel coloring for gradual ombre—go slow, adjust until you spot a satisfying gradient.
- Fill and Bake:
- Pour colored batters into pans, smoothing the tops lightly; bake until a toothpick comes out clean, then let layers cool fully before handling.
- Make Buttercream:
- Beat butter until soft, add powdered sugar in stages, then vanilla, salt, and milk—go for a spreadable, lump-free finish.
- Tint Buttercream:
- Reserve some plain buttercream for crumb coating; tint the rest with dark blue gel to match the bottom ombre layer.
- Layer and Fill:
- Once cooled, level each cake and alternate layering blue cake and buttercream—steady hands help here.
- Crumb Coat and Chill:
- Spread thin buttercream over the sides and top, then chill for 20 minutes to set—this keeps crumbs under control.
- Frost and Decorate:
- Apply the blue buttercream smoothly; for ombre, blend lighter blues toward the top before swirling on edible gold.
- Final Touches:
- Use gold leaf or brush dust mixed with clear alcohol for dramatic accents, then chill until ready to slice.
 Save
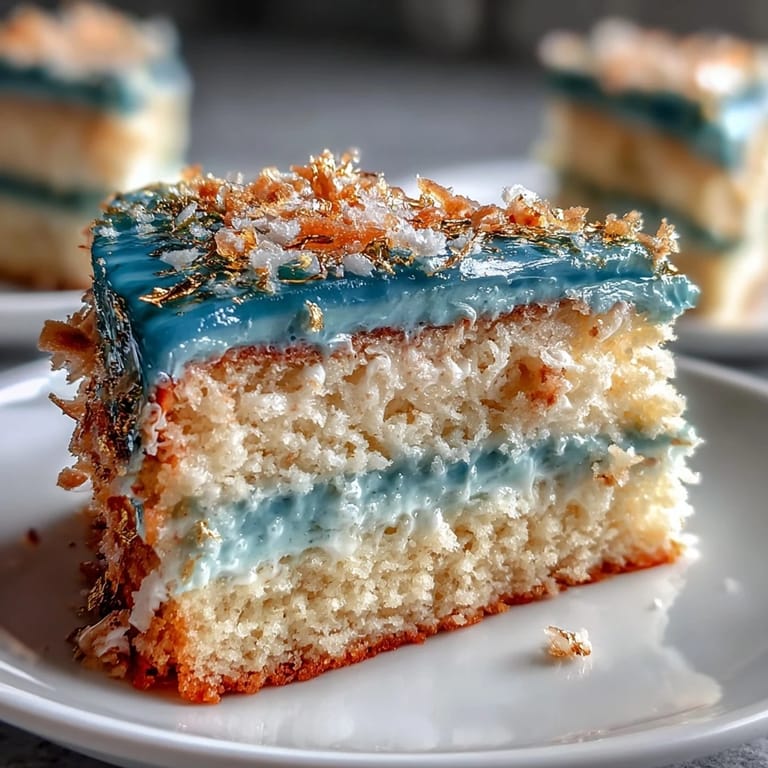
Save The cake took on a bittersweet significance the evening a friend brought it out as part of a surprise send-off, candlelight glinting off the gold edges. It wasn’t just a dessert that night—it became a symbol of accomplishment and new beginnings, with every slice marking a story shared among friends.
Mastering Ombre Layers Without Fuss
Mixing the colors for the ombre effect can feel intimidating at first, but patience pays off. I found that small amounts of gel coloring go a long way, especially when stirred gently just before baking. Using three bowls meant fewer messes and no accidental color blending—the gradient stands out best when poured with care.
Decorating for Drama and Joy
Gold accents transform the cake in moments, and the first time I laid edible gold leaf, I was nervous about tearing the delicate sheets. Keeping hands dry and a soft brush handy made the gold stay put, turning an ordinary cake into a showstopper. Blending lighter blue buttercream near the top feels like painting, and results in a subtle transition that brings smiles with every reveal.
Avoiding Common Troubles With This Cake
One day, a humid kitchen nearly wrecked my buttercream, leaving it runny and hard to frost. Chilling both the bowl and the ingredients made all the difference. Stacking cake layers when they’re even is less stressful, too. Remember to check your gold decorations for allergens to keep everyone safe, and never skip the crumb coat—it’s messy but worth it.
- Gold leaf tears easily; apply gently, and it will shine.
- If the buttercream seems too thick, add a half tablespoon of cream at a time.
- Chill the assembled cake before serving for sharp layers and easy slicing.
 Save
Save I hope this cake brings color and celebration to your graduation table—a centerpiece that tastes as good as it looks. Here’s to milestones, laughter, and a little kitchen magic in every bite.
Recipe FAQs
- → How do I achieve the ombre effect with cake layers?
Divide your batter into separate bowls and tint each portion with increasing amounts of blue gel coloring to create a gradient from light to dark. Bake each colored batter in its own prepared pan for distinct ombre layers.
- → What tips help create smooth buttercream frosting?
Use room-temperature butter. Gradually add sifted powdered sugar, beat well, and mix in milk or cream for spreadable consistency. Apply a crumb coat, chill, then finish with tinted buttercream for a flawless surface.
- → How can gold accents be added safely?
Use edible gold leaf or gold dust mixed with clear alcohol (vodka or lemon extract). Brush or apply decorations carefully on chilled cake for beautiful, edible shimmer. Verify decorations are food-safe.
- → What is the best way to assemble the layers?
Level cooled layers if needed. Start from darkest layer, spreading buttercream between each. Stack carefully for a neat finish before crumb coating and final frosting.
- → Can the cake be made in advance?
Yes, bake and cool layers in advance. Store unfrosted in the fridge. Assemble and decorate closer to serving for best freshness and texture.
- → Are graduation-themed toppers recommended?
Graduation toppers, chocolate stars, or fresh berries can enhance presentation and personalize the celebratory cake for the special occasion.