 Save
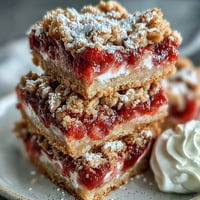
Save There's something about the sound of berries hitting a bowl that puts me right back in my kitchen on a Tuesday afternoon, sunlight streaming through the window while I debated whether to bake something or just call it a day. That's when berry crumble won—no fussy techniques, no stress, just fruit and oats and butter doing their thing in the oven. This recipe came together almost by accident when I realized I had a handful of berries going soft and decided they deserved better than the compost bin. Thirty minutes later, golden crumble on top and warm fruit bubbling at the edges, I understood why this became my go-to when I wanted something that felt homemade but didn't demand much from me.
I made this for my neighbor last summer after she mentioned craving something sweet but not too heavy, and watching her face when she took that first bite—the way her eyes got quiet and focused—that's when I knew this recipe was keeper material. She asked for it again the next week, and suddenly it became our little summer tradition, the kind of thing that doesn't need planning, just a text saying "crumble weather?" and knowing exactly what that means.
Ingredients
- Mixed berries (1 1/2 cups): Fresh or frozen both work beautifully; frozen berries actually release juice as they thaw, which is exactly what you want for that syrupy filling.
- Granulated sugar (2 tablespoons): Just enough to wake up the berries without making them cloying—adjust based on how naturally sweet your berries are.
- Lemon juice (1 teaspoon): This tiny bit of acid makes the berries taste more like themselves, cutting through richness and brightening everything up.
- Cornstarch (1 teaspoon): The secret to keeping your crumble from swimming in berry juice; it thickens as the fruit releases liquid.
- Rolled oats (1/4 cup): Use old-fashioned rolled oats, not instant—they'll stay textured and crispy rather than turning mushy.
- All-purpose flour (1/4 cup): Holds the crumble together while keeping it light; gluten-free blends work if you need them to.
- Light brown sugar (3 tablespoons, packed): Packed means pressed down into the measuring cup; brown sugar adds moisture and a subtle molasses depth to the topping.
- Ground cinnamon (1/4 teaspoon): Just a whisper of warmth that makes people say "what is that flavor?" without being able to quite name it.
- Salt (pinch): Balances everything and makes the butter taste more buttery.
- Unsalted butter (2 tablespoons, cold and diced): Cold butter is crucial—it creates pockets in the crumble that turn golden and crispy; warm butter will give you more of a cake texture.
Tired of Takeout? 🥡
Get 10 meals you can make faster than delivery arrives. Seriously.
One email. No spam. Unsubscribe anytime.
Instructions
- Preheat and gather:
- Turn your oven to 350°F and let it warm up while you get your bowls ready—this gives everything time to come together without rushing.
- Toss the berries:
- In a small bowl, combine your berries with the sugar, lemon juice, and cornstarch, stirring gently until everything's coated evenly. The berries will start releasing their juice almost immediately, which is exactly what should happen.
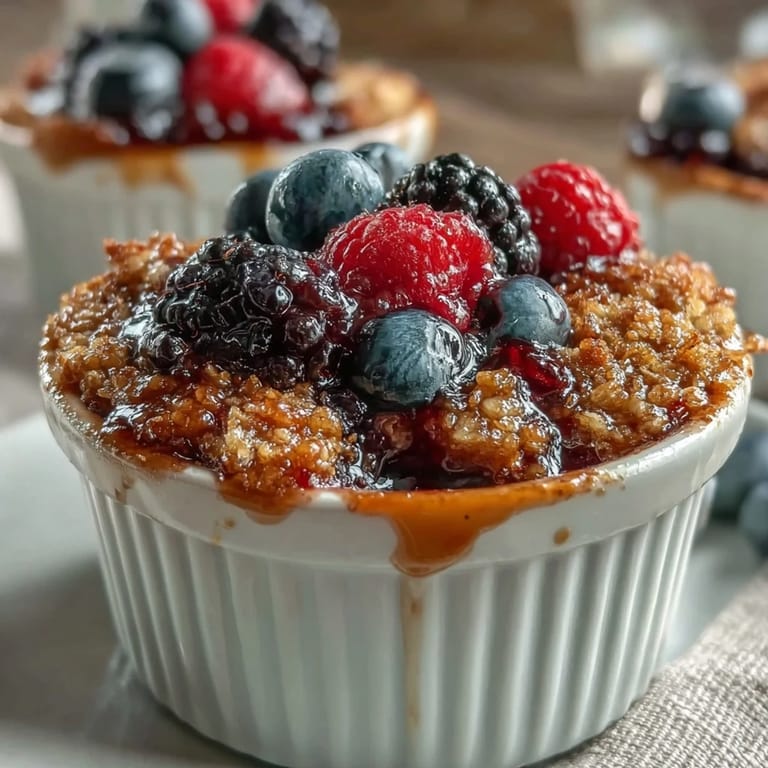
- Fill the vessels:
- Divide the berry mixture between two 6-ounce ramekins or spread it in a small baking dish—either way works fine, though ramekins feel a bit fancier if you're sharing. The berries should come about halfway up the sides.
- Make the crumble:
- In another bowl, whisk together the oats, flour, brown sugar, cinnamon, and salt until combined. Add your cold, diced butter and use your fingertips to rub it into the dry ingredients until the mixture looks like coarse breadcrumbs with some pea-sized clumps of butter still visible—this is what creates that crispy texture.
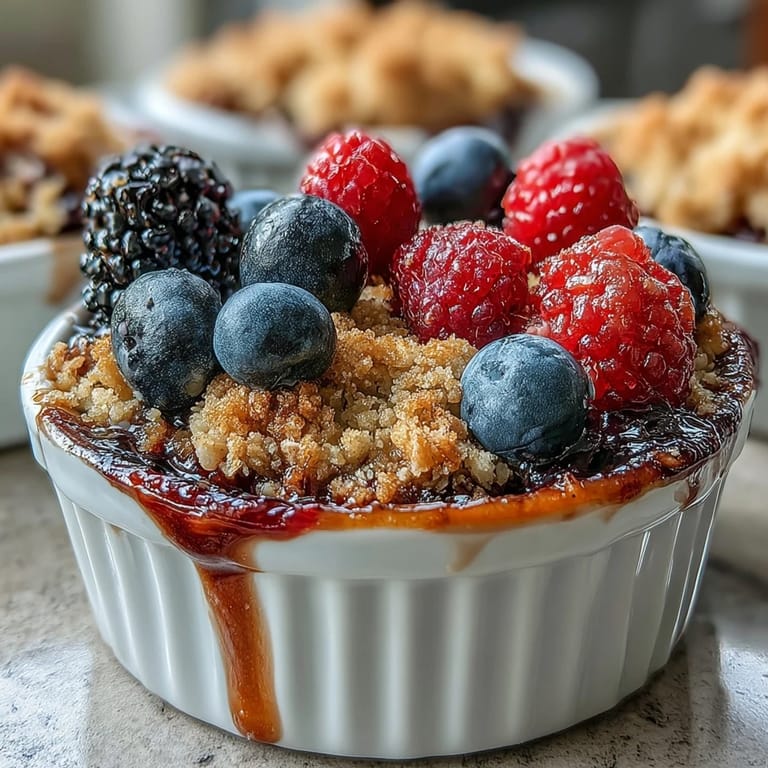
- Top and bake:
- Sprinkle the crumble mixture evenly over the berries, making sure it reaches the edges, then slide into the oven for 25 to 30 minutes until the topping turns golden brown and you can see the berry filling bubbling at the edges. You'll know it's ready when your kitchen smells like cinnamon and caramelized butter.
- Cool and serve:
- Let it rest for a few minutes—the filling will set up slightly and be less likely to slump out. Serve warm, plain or with vanilla ice cream if you're feeling indulgent.
 Save
Save There was a morning last winter when someone I care about showed up at my door having had a rough night, and I knew exactly what to do without asking what they wanted. Thirty-five minutes later, we were sitting on the kitchen counter in silence, passing a single warm ramekin back and forth, taking turns with two spoons, and not needing to say much of anything at all. That's when I realized this recipe isn't really about technique or ingredients—it's about having something ready that says "I'm here, and you matter" without making it complicated.
Why Frozen Berries Might Be Your Secret Weapon
I used to feel like frozen berries were a compromise, like I was settling, until someone pointed out that they're frozen at peak ripeness and often cheaper than fresh ones that have been sitting in a grocery store for days. Now I actually prefer them for crumbles because they burst open as they thaw, releasing their juice naturally into the filling and creating that syrupy texture you're after. Plus, you never have to worry about them going bad while you're deciding whether today is a crumble day.
The Magic of Butter and Your Fingertips
The topping is where the real transformation happens, and it hinges on this one quiet moment where you use your fingertips to break cold butter into the dry ingredients. Your hands are the perfect tool because they're warm enough to soften the butter slightly while you work, but not so warm that you melt it completely like a mixer would. You'll feel it come together under your fingers—the moment when separate ingredients suddenly become a cohesive crumble—and you'll know it's right because it'll look like coarse sand with some pea-sized clumps scattered throughout.
Variations and Personal Touches
Once you've made this a few times, you start seeing possibilities everywhere—a handful of chopped pecans or almonds stirred into the topping adds texture and a subtle nuttiness that pairs beautifully with berries, or a tiny pinch of nutmeg alongside the cinnamon if you want something that feels a bit more autumnal. Some people add a tablespoon of honey to the berry filling for extra sweetness, others use coconut sugar or swap half the butter for coconut oil if that's what they're cooking with. The skeleton of this recipe is sturdy enough to handle your experiments.
- Try adding a tablespoon of honey or maple syrup to the berry mixture if your berries taste a bit tart.
- Almond extract (just a quarter teaspoon) makes the whole thing taste like it came from somewhere more interesting than your kitchen.
- A squeeze of fresh orange zest into the crumble topping brings brightness that works especially well with darker berries.
 Save
Save This is the kind of recipe that gets better the more often you make it, not because the technique changes but because you stop thinking about measurements and start cooking by feel. It becomes something you can reach for on bad days, good days, or those quiet afternoons when you just want your kitchen to smell like cinnamon and butter.
Recipe FAQs
- → Can I use frozen berries for this dish?
Yes, frozen berries can be used directly without thawing, making preparation quick and easy.
- → How can I make the topping gluten-free?
Substitute the all-purpose flour with a gluten-free flour blend and use certified gluten-free oats to maintain the texture.
- → What variations can be added to the topping?
Chopped nuts like pecans or almonds can be mixed into the oat topping for added crunch and flavor.
- → What is the best way to serve this berry crumble?
Serve warm, optionally accompanied by a scoop of vanilla ice cream or a dollop of whipped cream to enhance the cozy experience.
- → How should I store leftovers?
Store any leftovers covered in the refrigerator and gently reheat before serving to preserve the crisp topping.