 Save
Save My brother showed up unannounced on a Saturday afternoon with a bag of perfectly ripe avocados and a challenge: make something we'd never tried before. I'd seen crispy avocado fries on a food truck menu weeks earlier and couldn't stop thinking about them. Within an hour, our kitchen smelled like toasted garlic and panko, and he was stealing them straight off the baking sheet before they'd even cooled. That moment taught me that the best recipes aren't always inherited—sometimes they're discovered by accident, with someone you love standing beside you.
I made these for a potluck once, worried they'd arrive at the party soggy and limp, but they stayed crispy all through the car ride and somehow disappeared before the main course. A friend asked for the recipe right there in someone's kitchen, standing over an empty plate with breadcrumb dust on her fingers. That's when I knew this one was a keeper.
Ingredients
- Ripe avocados: Two large ones should be firm but yield slightly to pressure—too soft and they'll fall apart in the breading, too hard and they'll taste like nothing. I learned this after ruining half a dozen trying to use avocados that were either overripe or barely ready.
- All-purpose flour: This creates the first protective layer and helps the egg mixture stick; don't skip it even though it seems redundant.
- Garlic powder and smoked paprika: These two ingredients do the heavy lifting for flavor, giving each bite a savory backbone that makes people ask what seasoning you used.
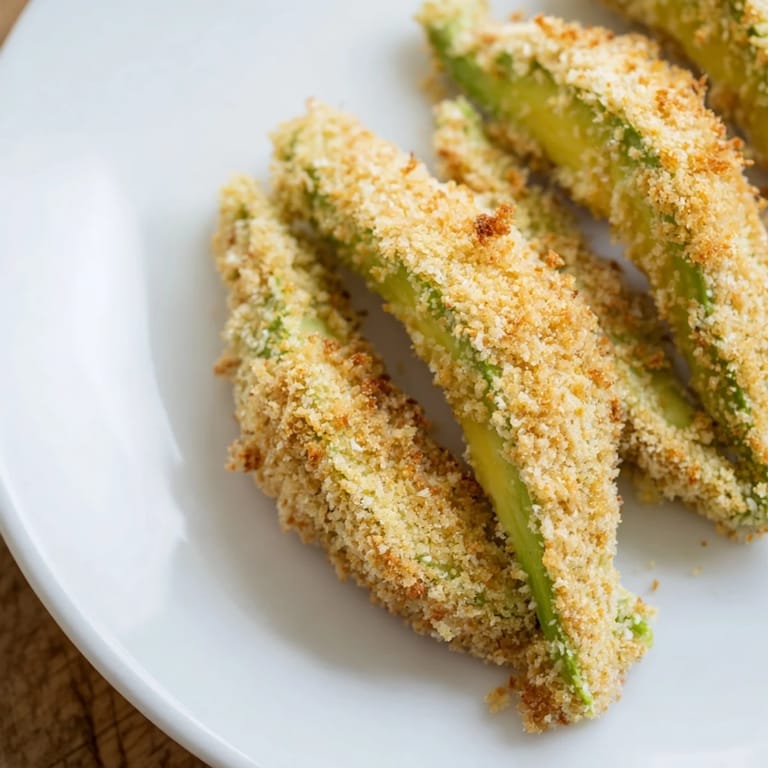
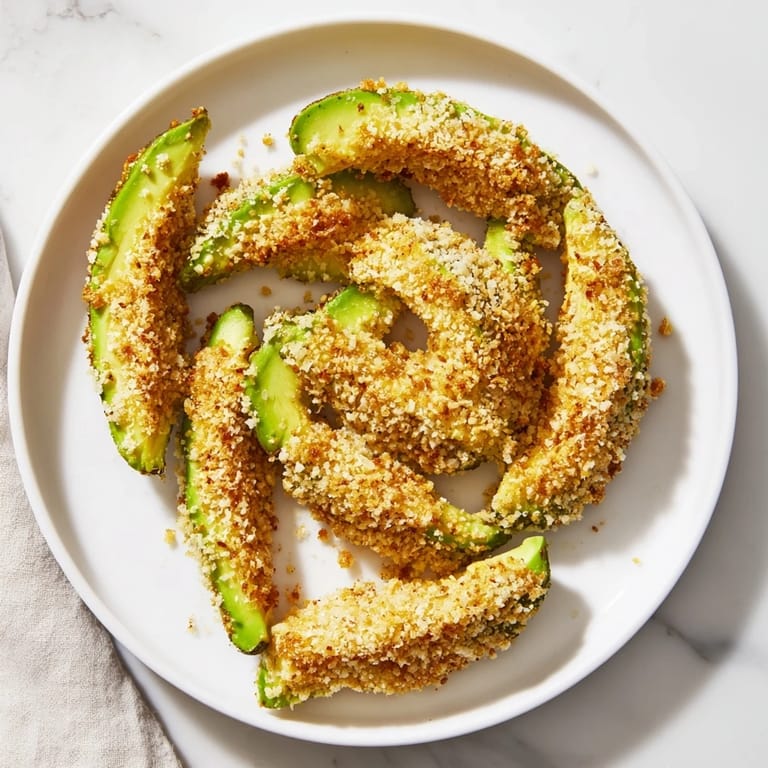
- Panko breadcrumbs: Regular breadcrumbs get dense, but panko stays airy and creates that satisfying crunch that makes these fries addictive.
- Parmesan cheese: Optional but genuinely worth adding—it browns beautifully in the oven and adds a nutty richness that elevates the whole thing.
- Eggs and milk: The egg wash is your adhesive; the milk thins it just enough so it coats evenly without pooling.
- Dipping sauce: Whatever you choose, make sure it's something you'd actually eat by itself, because that's where the magic happens on your palate.
Tired of Takeout? 🥡
Get 10 meals you can make faster than delivery arrives. Seriously.
One email. No spam. Unsubscribe anytime.
Instructions
- Get your station ready:
- Preheat the oven to 425°F and line your baking sheet with parchment paper—this is non-negotiable if you want them to release easily. Set up three shallow bowls in a line, like an assembly line, and you'll move through the breading process without any messy crossover.
- Prepare your avocados with care:
- Slice each avocado lengthwise around the pit, twist the halves apart, and carefully scoop the pit out with a spoon. Stand each half flat-side down and peel the skin away from the flesh, then cut each half into 4 to 5 thick wedges about half an inch wide—thicker than you think they need to be, because they shrink slightly as they bake.
- Build your breading station:
- In the first bowl, whisk together flour, garlic powder, smoked paprika, salt, and black pepper until it looks like fine sand. In the second bowl, beat the eggs with milk until completely combined, and in the third bowl, toss panko with grated Parmesan if you're using it.
- Bread each wedge with intention:
- Take one avocado wedge and roll it in the seasoned flour, shaking off the excess, then dip it into the egg mixture so it's completely coated, and finally press it into the panko breadcrumbs, making sure every surface is covered. Work quickly but carefully—rushing here means bald spots that won't crisp up.
- Arrange and oil:
- Place each breaded wedge on the prepared baking sheet in a single layer without crowding, then lightly spray or brush the tops with olive oil. This is the secret to getting them actually crispy rather than just baked.
- Bake until golden:
- Slide the sheet into the oven for 18 to 22 minutes, turning everything halfway through so they brown evenly on both sides. You'll know they're done when they're golden brown and the panko coating sounds crunchy when you tap it.
- Rest and serve:
- Let them cool for just a minute or two—long enough to set up but soon enough that they're still warm and the cheese is still a little soft. Serve immediately with lemon wedges and whatever dipping sauce you've chosen.
 Save
Save There's something magical about watching someone's face when they bite into one of these for the first time—that moment of surprise when they realize avocado can be crispy, that it can feel indulgent and light at the same time. It becomes a small victory in the kitchen, proof that sometimes the best dishes are the ones you stumble into rather than follow exactly.
Why Panko Is Your Secret Weapon
I tried making these with regular breadcrumbs once and immediately understood why panko has taken over every kitchen worth its salt. The larger, fluffier particles create air pockets that toast to a deeper golden brown and stay crispy much longer than fine breadcrumbs ever could. The moment they come out of the oven, you can hear the difference—that satisfying crunch that makes people reach for seconds before the first bite is even finished.
Dipping Sauce Pairings That Actually Matter
The sauce you choose becomes part of the story of these fries, so don't just grab whatever's in your fridge. A creamy aioli made with garlic and lemon brightens the richness of the avocado, while a spicy mayo adds heat that makes your mouth come alive. Even a simple squeeze of fresh lemon and a sprinkle of fleur de sel transforms them into something entirely different from when you started.
Timing and Temperature Tricks
The window between perfectly crispy and slightly overdone is smaller than you might think, but it's completely manageable if you keep one eye on the oven around the 18-minute mark. Every oven runs a little different, so the first time you make these, check them at 18 minutes and give them a gentle press—if they feel firm and the panko sounds crunchy, they're done. If they still feel soft, give them another two minutes and check again.
- Don't let them cool completely before serving, or the panko will harden in a way that feels less appetizing; they're best eaten within five minutes of coming out of the oven.
- If you're making these for a crowd, you can bread them all ahead of time and refrigerate them on the baking sheet for up to four hours before baking, which saves stress when guests are arriving.
- Leftover fries can be reheated in a 350°F oven for five minutes if you absolutely must, but they're honestly best eaten fresh and warm.
 Save
Save These fries have become my go-to when I want to impress without stress, when I want something that tastes indulgent but comes together in minutes. They're the kind of recipe that reminds you why cooking is worth doing in the first place.