 Save
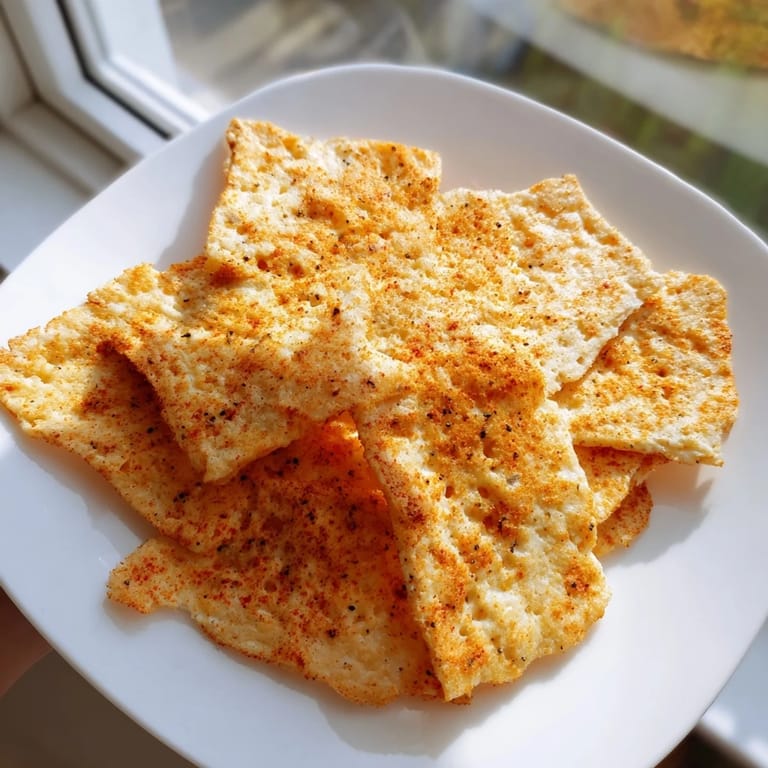
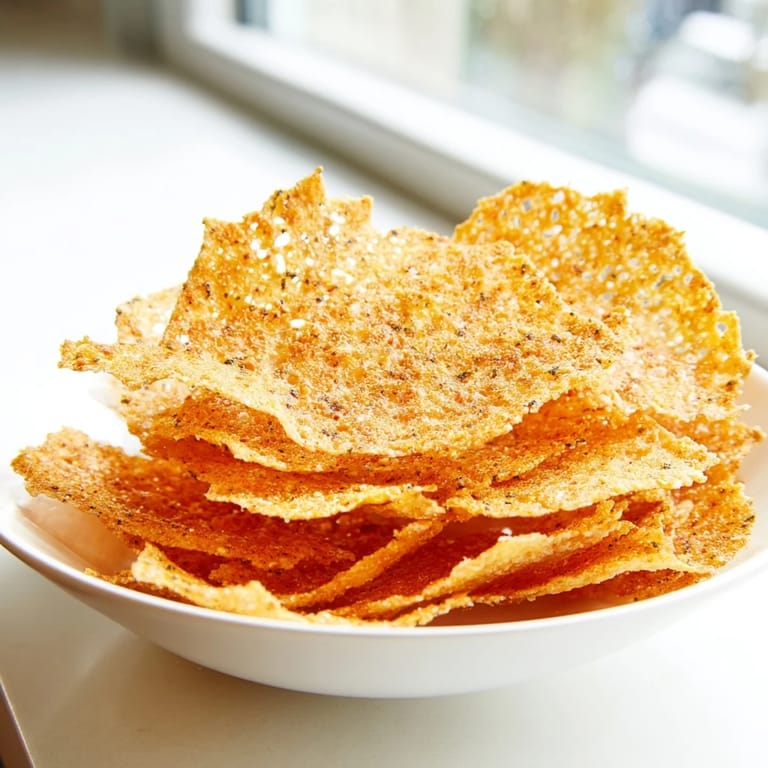
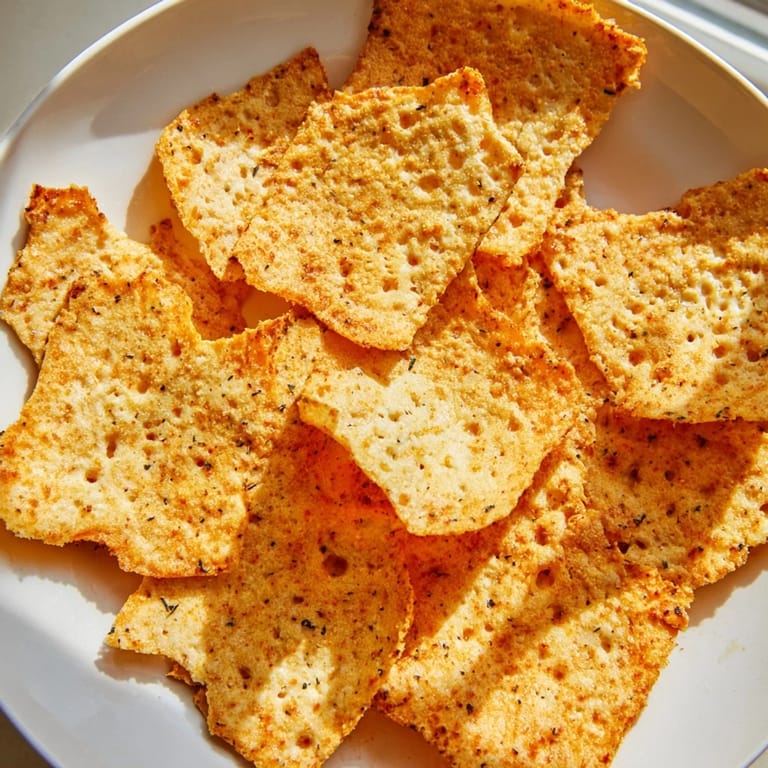
Save My roommate challenged me to stop buying processed protein snacks, so I started experimenting with what was actually in my fridge one Tuesday afternoon. Cottage cheese caught my eye—not for eating straight from the tub, but for transforming into something completely different. That first batch of golden, crispy chips shocked us both; they were nothing like the mushy dairy product we expected. Now I make them weekly, and they've become the snack I actually look forward to reaching for.
Last month I brought these to a friend's movie night, and the skepticism in the room was palpable until everyone tried one. Watching people's faces shift from "wait, that's made from cottage cheese?" to actually asking for the recipe felt like a small victory. That moment made me realize how many people dismiss cottage cheese entirely, missing out on how versatile it actually is when you stop thinking of it as just a side dish.
Ingredients
- Cottage cheese (2 cups, full fat or low fat): Full fat gives richer flavor and crispier edges, but low fat works perfectly fine if that's what you have on hand.
- Garlic powder (1/2 teaspoon): More honest than fresh garlic here since it won't burn and adds concentrated savory depth.
- Onion powder (1/2 teaspoon): Similar reasoning as garlic—it integrates smoothly and won't create hot spots.
- Smoked paprika (1/2 teaspoon): This is the ingredient that makes people pause mid-bite and wonder what that subtle warmth is.
- Black pepper (1/4 teaspoon): Fresh cracked is lovely if you have a grinder, but pre-ground works without any compromise.
- Sea salt (1/2 teaspoon): The finishing touch that brings every other flavor into focus.
- Parmesan cheese (1 tablespoon, optional): Adds umami and helps the edges brown faster, genuinely worth including.
- Dried herbs (1 teaspoon, optional): Oregano, thyme, or rosemary all shine here and let you change things up based on mood.
Tired of Takeout? 🥡
Get 10 meals you can make faster than delivery arrives. Seriously.
One email. No spam. Unsubscribe anytime.
Instructions
- Set your oven and prep your surface:
- Preheat to 350°F and line your baking sheet with parchment paper or a silicone mat—this prevents sticking and makes cleanup honest work. The parchment keeps everything from breaking apart when you move the sheet around.
- Drain the cottage cheese thoroughly:
- Scoop it into a fine mesh sieve or cheesecloth and let it sit for a minute, pressing gently with the back of a spoon. Excess moisture is your biggest enemy here; it prevents crispiness and extends cooking time unnecessarily.
- Season and blend:
- Dump the drained cottage cheese into a food processor with garlic powder, onion powder, smoked paprika, pepper, and salt. Add Parmesan and herbs if you're using them, then blend until the texture is mostly smooth with just a hint of grain remaining—you're aiming for something between hummus and ricotta, not baby food.
- Scoop and flatten:
- Use a teaspoon to dollop the mixture onto your prepared baking sheet, spacing each one about an inch apart. With damp fingertips, flatten each dollop into a thin round chip about two inches wide—think the thickness of a corn chip, not a quarter.
- Bake until golden and crisp:
- Slide everything into the oven for 25 to 30 minutes, watching around the 25-minute mark for that golden-brown color, especially around the edges. The chips will firm up considerably as they cool, so don't panic if they feel slightly soft when you pull them out.
- Cool completely before eating:
- Leave them on the baking sheet while they cool completely—this is when the real magic happens as residual heat finishes the crisping process. Once cooled, serve immediately or store in an airtight container for up to five days.
 Save
Save A few weeks ago my sister brought her kids over, and I nervously set out a bowl of these next to the usual candy bowl. I expected them to ignore the chips entirely, but they actually reached for them first, which says something about how satisfying these are even without marketing them as "healthy." Sometimes the best part of cooking is when food stops being about nutrition facts and just becomes something people genuinely want to eat.
Flavor Variations That Actually Work
The base recipe is fantastic, but cottage cheese chips are honestly a blank canvas waiting for whatever you're craving. I've done spicy versions with cayenne and a whisper of chili powder that completely changed the mood of the snack. Last weekend I tried an everything-bagel situation with sesame seeds, poppy seeds, and coarse salt mixed into the base, and it was restaurant-quality good. The beauty is that you can make a batch, set aside some base mixture, and divide it into multiple flavor experiments without doubling the work.
Storage and Reviving Leftovers
These chips store beautifully in an airtight container for about five days, which makes them perfect for meal prep or just having around when you need a protein boost. The only quirk is that they lose their pristine crispness after day two, but here's the secret: pop them back into a 300°F oven for three to five minutes and they come back to life completely. I always keep a stash in my desk at work, and two minutes in the office toaster oven is all it takes to make them taste fresh again.
Why This Snack Actually Sticks
What makes cottage cheese chips different from other high-protein snacks is that they feel intentional without being fussy. You're not wrestling with dough, waiting for rising times, or using a bunch of equipment you'll never touch again. The quiet satisfaction of eating something you made yourself, something that actually tastes good, something that keeps you full—that's the real win here.
- Make them ahead: Bake a full batch on Sunday and portion them into containers for grab-and-go snacking all week.
- Experiment with heat: If your oven runs hot, start checking at 23 minutes; if it runs cool, you might need the full 30 or even a couple minutes extra.
- Pair them with something: They're fantastic with a hummus dip, a quick salsa, or honestly just eaten plain because they're already flavorful enough to stand alone.
 Save
Save These chips have genuinely become part of my regular rotation, the kind of thing that makes you wonder why you didn't discover it sooner. Once you taste homemade, you'll understand why reaching for a bag of store-bought snacks suddenly feels unnecessary.
Recipe FAQs
- → Why do you need to drain cottage cheese before making these chips?
Draining removes excess moisture, which is essential for achieving a crispy texture. Wet cottage cheese will steam rather than bake, resulting in soft, chewy chips instead of the desired crunch.
- → Can you use low-fat cottage cheese instead of full-fat?
Yes, low-fat cottage cheese works well and reduces overall calories. Full-fat versions provide slightly richer flavor and may become crispier, but both produce delicious results.
- → How should you store leftover chips?
Store in an airtight container at room temperature for up to 3 days. If they soften, re-crisp them in a 300°F oven for 5-10 minutes before serving.
- → What seasoning variations work best?
Beyond the basic blend, try everything seasoning, Italian herbs, ranch powder, or smoky BBQ seasonings. Parmesan and cheddar additions enhance savory depth. Experiment with cayenne, paprika blends, or dried dill for unique flavors.
- → Why do the chips continue crisping after baking?
As the chips cool completely on the baking sheet, residual heat continues evaporating moisture, intensifying their crispness. This is why cooling completely before serving matters.
- → Can you make these ahead for meal prep?
Absolutely. These chips keep well in airtight containers for up to 3 days and are perfect for meal prep. Re-crisping in the oven restores their original texture before eating.